Do you need to replace a bathroom exhaust fan with a newer or stronger one? If your bathroom fan is installed in a finished ceiling, this can be a challenging project without attic access!
You see, most ventilation fans are made to be installed in an unfinished or open ceiling where you have easy access to duct work. However, if your bathroom is located on a level of your home with a floor above, you won't have the luxury of accessing the fan from the attic.
In this post I'll show you how to replace a bathroom fan in a finished ceiling where you can't access it from an attic.

Bathroom Fan Replacement
Bathroom ventiliation fans are an essential component to any bathroom. They exhaust moist (or stinky) air outdoors, while pulling in cleaner/drier air from your surrounding rooms.
Without a bathroom ventilation fan, your bathroom surfaces will become moist during a shower or bath. This could potentially lead to mold problems down the road. Besides that, who wants to wait a few minutes for a foggy mirror to clear up after a shower?! I know I don't, because every minute counts in my house!
The bathroom ventilation fan I'm replacing in this guide is a small 7-inch square fan. It did a decent job of pulling moist air from the bathroom during a shower, but it was far from perfect.

For starters, the mirror was still foggy after running the fan during a shower. Plus, it was loud! Loud to the point where you couldn't have a conversation with someone without borderline yelling at them while the fan was on.
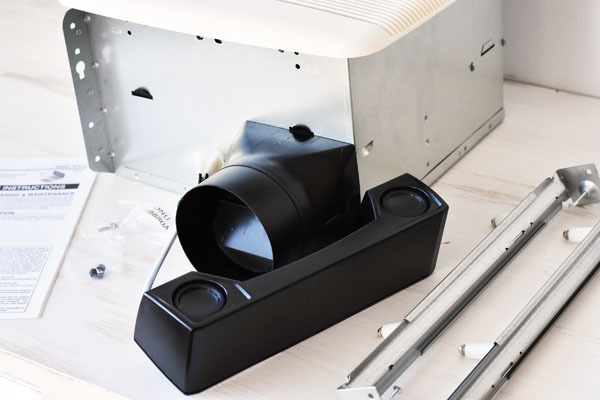
The replacement bathroom ventilation fan I'm using is the Broan Sensonic Model SPK110 Speaker Fan. The Broan Fan is larger than my old fan and it's much quieter.
Oh, did I mention that the Broan Sensonic Speaker Fan features a Bluetooth enabled speaker box inside its housing?! The Bluetooth speaker inside the Sensonic vent fan is not only innovative and convenient, it's actually a high quality speaker!
The new fan moves 110 CFM (cubic feet per minute) of air, and has a sound level of 1.0 sone.
What is a Sone?
Sone is a unit of measure for sound, just to give you an idea of how quiet 1.0 sone is, it's about the same volume as a quiet refrigerator. A value of 1.0 sone is considered very quiet for a ventilation fan!
Install:
If you'd like to watch the install on video, you can watch below. If you prefer to read or want more detail, continue reading:
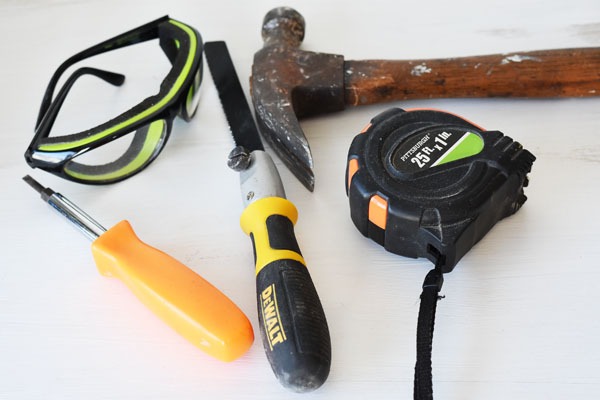
Tools Needed:

- Tape measure
- Hammer
- Screwdriver
- Drywall Saw
- Safety Glasses
- Utility Knife (optional & not pictured)
- Pencil (optional & not pictured)
- Hand Drill (optional & not pictured)
Every Situation is Different:
Just like every home is different, so is every situation! My bathroom fan installation was into a finished ceiling in my first-floor bathroom. I have a 2nd-floor bathroom above this room, and the space above the ceiling was previously opened up by the former owner of my house.
They used metal studs to extend the ceiling several inches below the joists above. Unfortunately, this is the kind of weird stuff you encounter when working on older homes!
My situation may or may not be the same as yours, but I'm sure it was worse than most people's. Therefore, I'm going to try and explain my situation for those who have similar setups, but also explain the more common installation scenario.
Wiring and Ductwork:
If you're installing a new fan into an unfinished ceiling, you'll need to run wiring to the location of the fan. Plus, you'll need to run the required ductwork to the outside of the building. NEVER LET AN EXHAUST FAN VENT INTO A CEILING CAVITY OR ATTIC!
I'm not going into detail here because I used existing ductwork, and all installation jobs will be different. Plus, you shouldn't be handling electrical wiring or installing ductwork if you don't know what you're doing!
Tip:
Your duct should be as short and straight as possible. This will ensure that you get the quietest and best airflow your bathroom exhaust fan has to offer.
Step 1:
If you're replacing an existing fan, you need to:
- De-energize the circuit that powers the existing fan. This means turn-off the circuit breaker!
- Verify that the circuit is de-energized with a voltmeter or circuit tester.
- Remove the existing fan and all of its components. Leave just the home wiring and ductwork.
Step 2:
If your new fan is bigger than the old one, you will need to increase the size of the ceiling cutout.
- Mark the new opening with a pencil by holding the replacement fan's housing over the existing cutout.
Replacing the Exhaust Fan Without Attic Access:
When you're installing the bathroom fan into a ceiling below another floor, your new fan won't simply slide into a size-for-size opening.
You must cut the hole bigger to allow the protruding parts of the housing to make it through the cutout.
In my case, I had to cut the hole an additional ½"-¾" per-side to allow the housing to slide in on an angle.
You will also have to bend the mounting flanges into the housing about 90 degrees to give the housing as small a footprint as possible. You could also cut or grind them off.
This method is not recommended by the manufacturer, but it's the only way to replace a bathroom vent fan without replacing a huge section of ceiling!
This method worked for me, but I don't recommend it for everyone! If you're not careful, you might damage your new fan by bending the fins. Therefore, be super careful to not damage the motor or fan blades if you need to remove the mounting flanges.
Replacing the Exhaust Fan With Attic Access:
If you're installing the fan into a ceiling that has an attic directly above, the process is much easier!
You should be able to cut your opening size-for-size, because you'll mount to your joist from inside the attic.
- Score the marked lines with a sharp utility knife.
- Use a drywall saw to cutout the new opening.
- Test fit the opening and adjust as necessary.
- Refer to the fan's installation instructions for the rest of the process.

Typical Bathroom Exhaust Fan Replacement Procedure:
The steps below may not be exactly the same for every bathroom vent fan installation, but should be generally the same. Always refer to your new fan's installation instructions for the specific requirements of your make and model.
- If the exhaust fan requires some assembly, assemble it according to the manufacturer's instructions.
- Mount the fan housing to the ceiling joist.
- If installing in a ceiling below the attic, you can do this from inside the attic. Just be sure to align the fan housing with your cutout as even as possible.
- In my case, I had to connect the wiring and duct work to the fan first, because everything is hidden after my housing was installed. If this is your case too, skip mounting for now and go to the next step.
- Connect electrical wiring according to the instructions provided with your fan.
- Connect the duct work according to your fan's instructions.
- (If installing in finished ceiling with floor above only) Mount the fan housing to your ceiling joists by screwing through the fan housing.
- Install the grille.
- Turn the circuit breaker back on.
- Test the fan's operation.
Conclusion
If your new bathroom fan works, give yourself a pat on the back! you should feel good knowing you successfully accomplished another home project.
Installations like this can be a real challenge because you never know what you're going to encounter when you peak inside an old home ceiling or walls! Keep in mind, projects always go smoother when you have the right tools for the job.
Wait, Before You Go!
If you're new to home ownership or are tired of paying other people to do the job for you, be sure to sign up for my email list. I'll send updates whenever I post a new guide or article about a home projects, tools, or husband life! As a thank you gift, you'll receive a copy of my 55 Tools Every Homeowner Should Own Checklist, which is based on this post.
Also, If you have a central air conditioner installed in your home, check out this article on How to Fix and Avoid Common HVAC Problems!


Let Me Know What You Think