Do you need to hang a shelf on a wall?
Hanging a shelf is actually an easy project. However, there are some important steps you must follow to do it right. Otherwise, it might come tumbling down once you place an object on it! This helpful guide will tell you everything you need to know...
Shelves come in many different styles, shapes, and sizes. In addition to that, shelves can be mounted to many different wall types. Because of this, there are various ways to properly secure one to a wall.
In this easy step-by-step guide, I'll explain the different types of shelves and how to hang them the right way!

Below is a list of topics I cover in this guide. Go ahead and click on any of these links to jump to that specific section.
- Types of shelves
- Before You Begin
- Hanging a Basic Shelf
- Hang a Shelf with Wall Studs
- Hang a Shelf Without Wall Studs
- Layout of Shelf Brackets
- Mount Shelf to Wall Brackets
Types of Shelves
The concept of a shelf is simple. By definition - It's a length of narrow rigid material (like wood or metal) mounted horizontally to a wall (or other surface) for the purpose of storing or displaying objects.
Although a simple concept, the world of shelving is full of variety. Consider these different shelving materials and their typical purposes:
Basic Shelves
A basic shelf is what most people picture when they think of the word "shelf". It's a straight, flat, narrow length of board attached to a wall by shelf brackets.
This guide will teach you everything you need to know about hanging a basic shelf. You can skip to that section here if you want to skip the fluff and get straight to the info. But before we start, let's explore the general types of shelves you'll encounter everywhere.
Floating Shelves
A floating shelf is one that's fastened to a wall using some type of hidden bracket or mounting system. These shelves give the appearance that they're floating because the observer can't see how it's held to the wall.
Wood Shelves
Wood shelves can be decorative, functional, and sturdy all at the same time. They can be made from solid wood like oak, cherry, maple, etc... Or they can be made of engineered wood such as Oriented Strand Board (OSB), Medium Density Fiberboard (MDF), particle board, etc...
Since wood shelves can be made from so many varieties of wood material, their uses vary just as much. Wood shelves can be used to display decorative objects inside a home, organize objects inside a closet or basement, or organize objects inside a cupboard or cabinet. In fact their use for storage and display is only limited by your imagination.
Wood shelves can be hung to a wall with shelf brackets or be mounted to appear as if it's floating.
Metal Shelves
Metal shelves are typically divided into two categories - wire and solid.
Wire shelves are also very popular in commercial and industrial settings. Like solid metal shelves, wire shelves can be purchased in different materials like stainless steel, chrome plated steel, epoxy coated, powder coated, or painted mild steel.
In homes, wire shelving is usually white (painted or coated) mild steel. They can be mounted to any type of wall with special brackets made specifically for wire shelves. This type of shelving is usually found in home closet systems because of its affordability, strength, and lightweight structure.
Solid metal shelves are typically found in commercial or industrial environments. They're usually made from sheet metal and come in different gauges (thickness) and material. The strength of a solid metal shelf is dependent on the gauge thickness and material it's made of. The amount of weight it can handle also depends on the method or material it's mounted to.
Solid metal shelves usually aren't mounted to walls, but they certainly could be with the right brackets. Instead, they're usually used in heavy duty metal cabinets and shelf systems.
Since this guide focuses on home shelving, we won't be covering solid metal shelves here.
Before You Begin...
Before you dive in and start drilling holes, there are a few things you need to consider first:
Finding a Good Location
Choosing the perfect location for a shelf is one of the most important steps of the process. If you're hanging a decorative shelf inside your home, its location is just as important as the shelf style and material.
Choose a location that is not in the way of high traffic areas, and make sure there is no risk of people bumping into it easily. I mean, you don't want them to damage it or knock things off the shelf easily! Oh yeah... you wouldn't want to injure anyone either!
Choose the Height
The height of a shelf depends on its purpose. Shelves made for displaying decorative objects, are usually hung at eye level. Similar to a picture, you want a decorative shelf to be easily viewed and possibly the focal point of that space.
Storage shelves are usually hung at various heights because there are usually more than one. A wall of storage shelves can have as many shelves as you desire, depending on the types of objects it will hold.
In fact, you can vary the distance between shelves. For example, you could mount a shelf 12 inches from the ceiling, then another 18 inches from that shelf, then another 24 inches from that shelf, and another 30 inches from that self. In this example, you can store larger/heavier objects on the lower shelves, and smaller/lighter objects on the higher shelves.
Determine Placement
Once you find a general location for your shelf, you need to zone in on the exact placement of it. This is super important because it determines how much weight the shelf can hold and/or how you should mount it.
Let me explain...
Most walls of a house or apartment are made from wood studs (2x4's or 2x6's) and are covered with finished drywall. The walls are constructed so the studs are 16 inches apart (from center to center). As a result, there is 14 ½ inches of hollow wall space in between each stud.
As a result, you typically have two choices when deciding shelf placement - mount directly to the studs or use wall anchors.
If your shelf is heavy or will be supporting heavy things, it's recommended to mount it to studs.
If you are mounting to hollow wall, you will need to use wall anchors. This is because typical wall material like drywall or plaster is too soft for the threads of the screws to grip into.
How to Hang a Basic Shelf
If you prefer to watch the process, you can see it in my in-depth video below. If you prefer to read the detailed process keep reading...
To hang a basic shelf with brackets, you'll need the following tools and supplies:
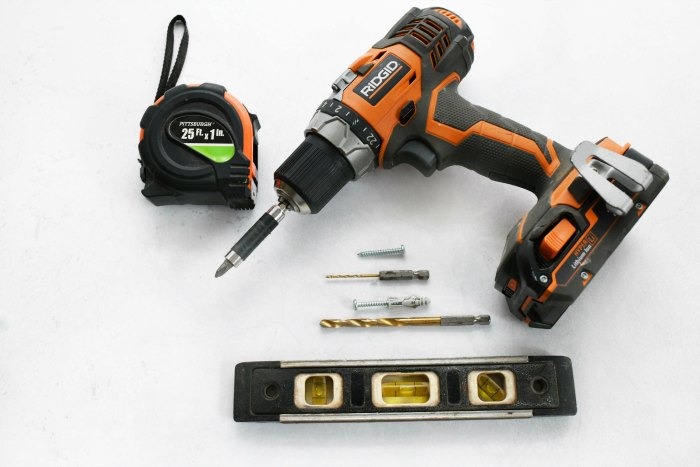
Supplies
- The shelf (or shelves)
- Shelf brackets
- Screws and/or wall anchors
Tools
- Hand drill
- Drill bits
- Stud finder (to locate the studs if applicable)
- Bubble level
- Measuring Tape
- Pencil
- Vacuum (helpful for cleaning up the dust)
For clarity, the process below is separated into two different variations - hanging a shelf with wall studs and hanging a shelf without wall studs.
Hang a Shelf With Wall Studs
After determining the placement of your shelf, you need to layout for the holes that will be pre-drilled for screws.
NOTE: The length of your shelf will determine how far apart the shelf brackets are spaced. Because of this you might be attaching one, both, or none of them to studs.
For example... since studs are 16 inches apart on center, a 24 inch long shelf won't be able to catch two studs. Therefore, one of the brackets will require wall anchors.
Find a Stud
Using a stud finder, find the nearest stud to the place you want your shelf to hang. Make sure the stud is located at one of the sides that your shelf ends.
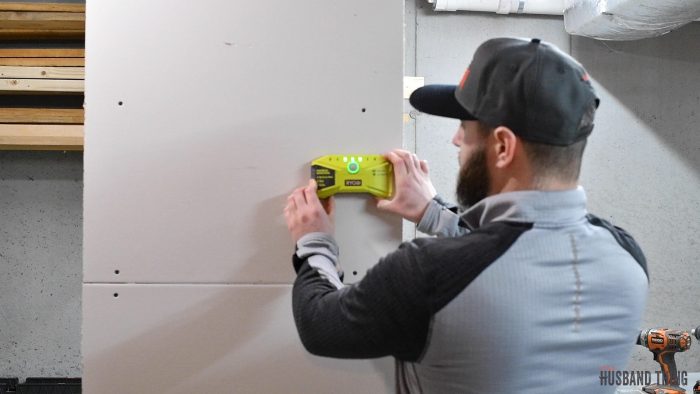
Stud finders will usually indicate where the center of the stud is. Mark the center of the stud with a pencil.
Layout
Grab one of the shelf brackets and position it on the wall in line with the pencil mark that indicates the stud's center and at the height you want the shelf.
With a pencil, mark the wall by tracing a circle inside the top hole of the shelf bracket that faces the wall.
Set the shelf bracket aside.
Obtain Screws and Pre-Drill
Obtain the screws that came with the shelf bracket. If your shelf bracket didn't come with screws, then you need to get some.
Select a drill bit that is slightly smaller than the minor diameter of the screw's threads. If you picture the screw with all of the threads stripped out, the solid material left at the bottom of the threads is the minor diameter.
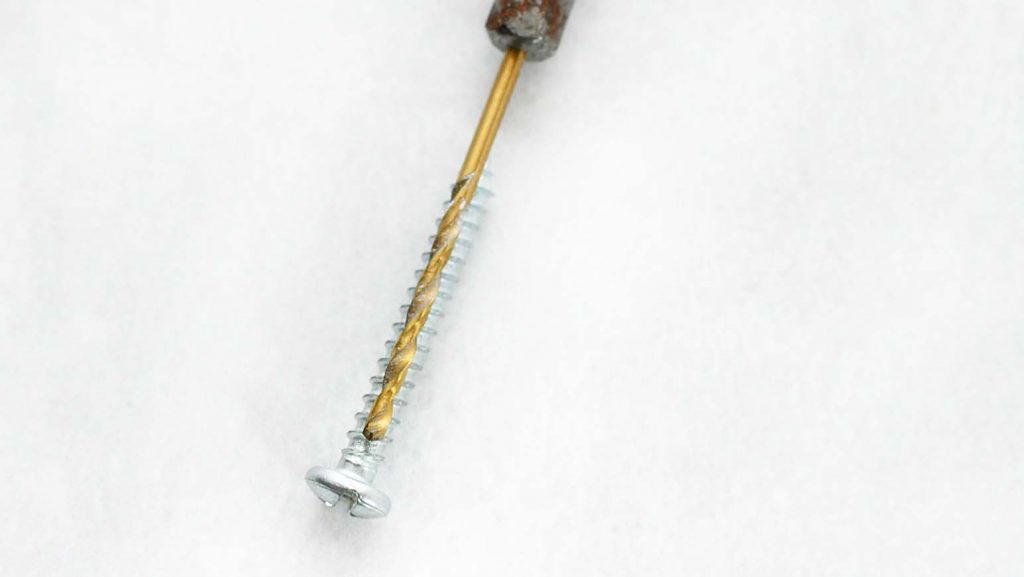
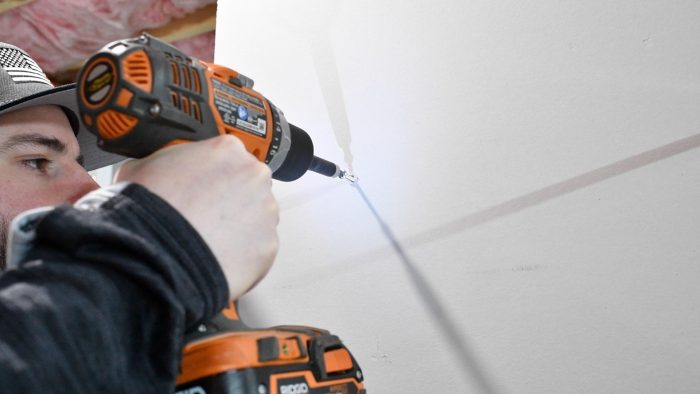
Drill Top Hole
Drill a hole into the wall at the location you marked with the shelf bracket. You should feel the drill bit drilling into the wood stud inside the wall and even see wood chips evacuate from the hole. If you miss the stud, the drill will quickly plunge into the hollow wall.
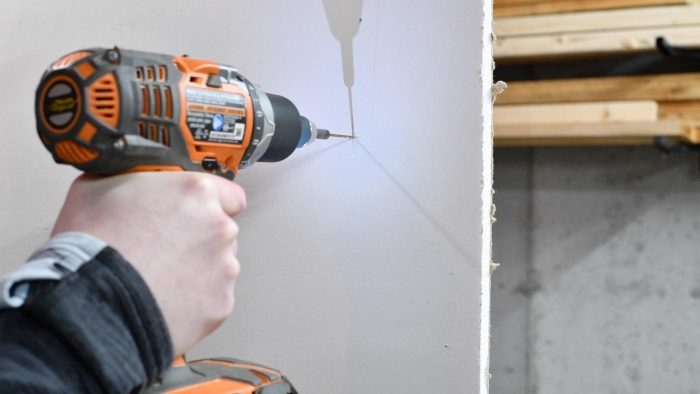
Drill to a depth equal to the length of the screws you're using.
Hang the Bracket From Top Hole
Place the shelf bracket back on the wall and align the top hole with the hole you just drilled into the wall.
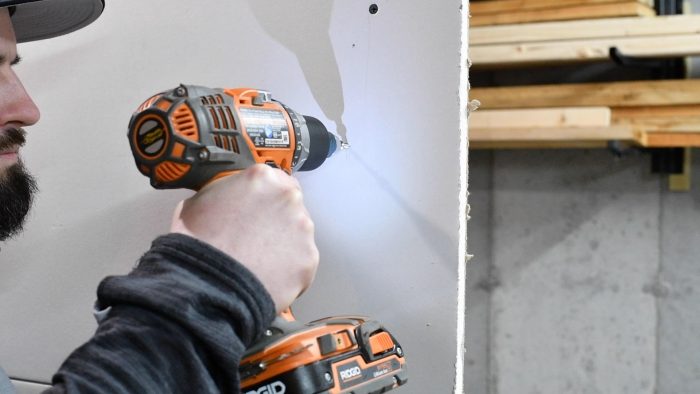
Screw the bracket onto the wall using a screw, but only tighten it to the wall slightly. Tighten it enough so it can't swing freely, but not so tight that you cant rotate the bracket.
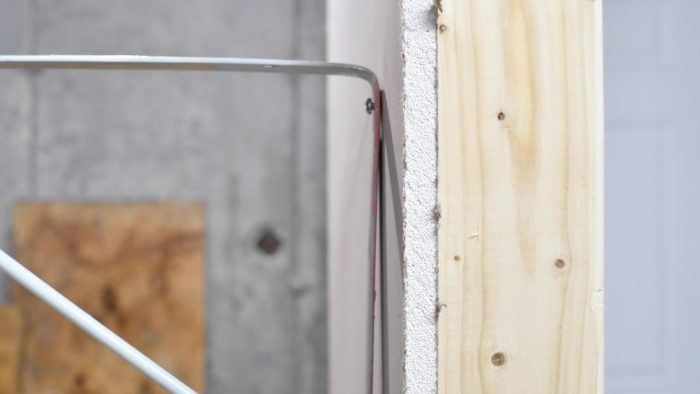
Level the Bracket
Grab your bubble level and place it on a flat surface of the bracket - along the side of it is best, but if the sides aren't straight, you'll have to place it on the top surface that the shelf attaches to.
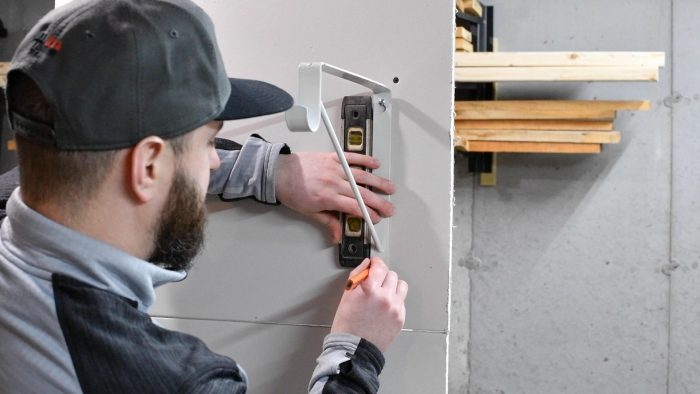
Mark Bottom Hole
Adjust the shelf bracket so it's level, then mark the bottom hole of the bracket the same way you marked the top hole on step 4.
Swing the bracket aside so it doesn't block the pencil marking (Sometimes you'll need to tighten the top screw slightly to get the bracket to stay out of the way. If you can't for some reason, just unscrew it from the wall completely and put it aside.)
Finish Bottom Hole
Repeat the drilling steps (steps 8 -9).
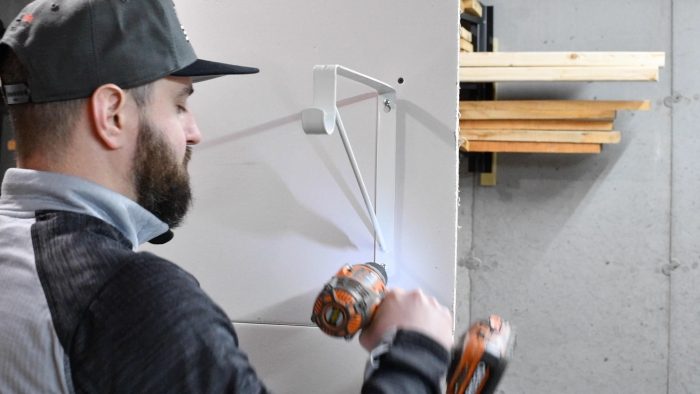
Screw the bracket onto the wall using both holes.
Repeat for the remaining shelf bracket(s).
Hang a Shelf Without Wall Studs
There are many cases when you'll want to hang a shelf on a location of a wall that's not over a stud. In this case, you need to use wall anchors because the wall interior is hollow.
Wall anchors are available in many different designs and are either plastic or metal.
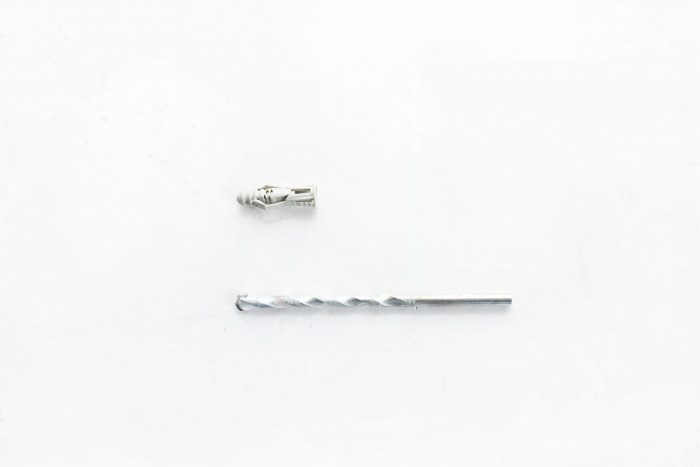
The process is almost the same as above, but this time you'll need a drill bit sized for the drywall anchor. Luckily, a lot of anchors come with the drill bit included in the package. This is ideal because you don't need to worry about already owning (or separately buying) the correct size.
If your wall anchors don't come with a drill bit, check the package or instructions for the required drill bit size. If that information isn't available or accessible, simply find the drill bit that matches the nominal diameter of the wall anchor.
Mount the Bracket(s) to the Hollow Wall
Determine the location over the hollow wall that the hole for the wall anchor needs to be drilled.
If you already have a shelf bracket mounted and this is your second bracket, go to the layout section of this guide.
Layout
Grab the shelf bracket and position it on the wall where you want it to be mounted.
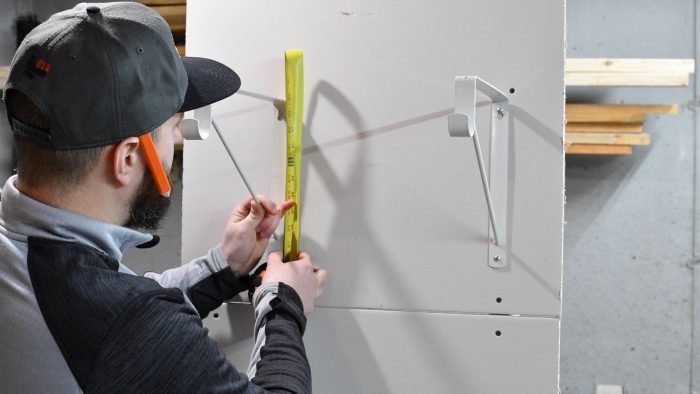
With a pencil, mark the wall by tracing a circle through the top hole of the shelf bracket that faces the wall.
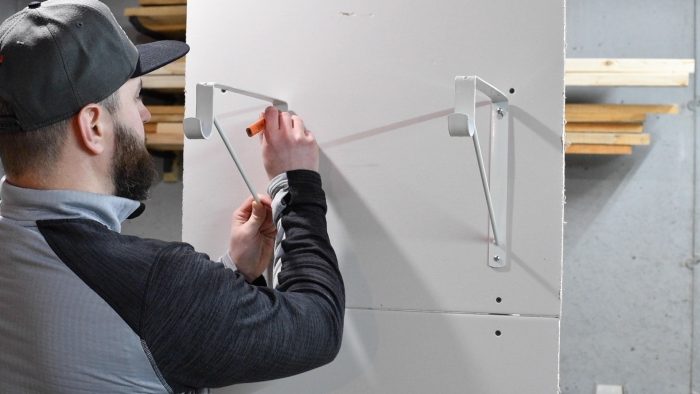
Set the shelf bracket aside.
Obtain Wall Anchor and Drill Bit
Select the properly sized drill bit for the wall anchor you're using. The package of anchors should indicate the drill size, or ideally provide the drill bit.
Drill Top Hole
Drill a hole into the wall at the location you marked with the pencil. The drill should quickly plunge into the hollow wall. If you penetrate the drywall and immediately feel resistance, STOP! You may have found some internal electrical wiring, plumbing, or carpentry. Don't proceed tampering with this hole until you know what's behind the wall!
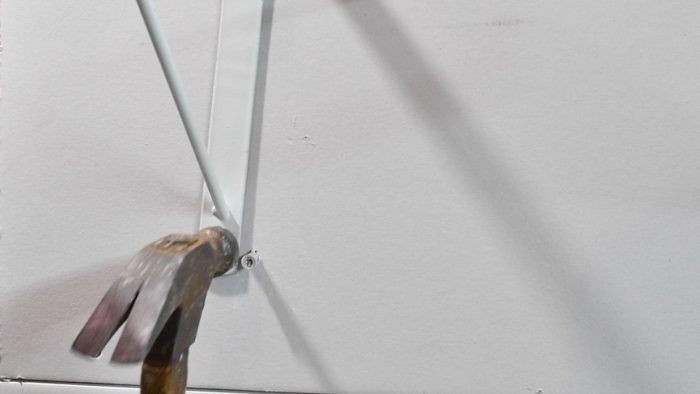
Insert Wall Anchor
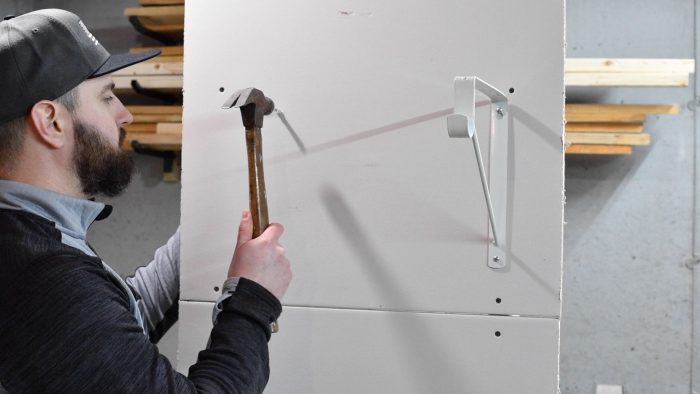
Grab your wall anchor and lightly tap it into the hole with a hammer or other object.
Hang Bracket from Top Hole
Place the shelf bracket back on the wall and align the top hole with the hole you just drilled into the wall.
Screw the bracket onto the wall using a screw, but only tighten it to the wall slightly. Tighten it enough so it can't swing freely, but not so tight that you can't rotate the bracket.
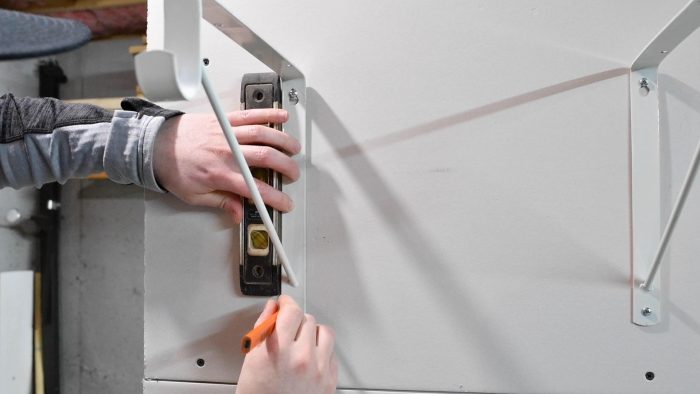
Level the Bracket
Grab your bubble level and place it on a flat surface of the bracket - along the side is easiest, but if the sides aren't straight, you'll have to place it on the top surface that the shelf attaches to.
Mark Bottom Hole
Adjust the shelf bracket so it's level, then mark the bottom hole of the bracket the same way you marked the top hole on step 4.
Swing the bracket aside so it doesn't block the pencil marking (Sometimes you'll need to tighten the top screw slightly to get the bracket to stay out of the way. If you can't for some reason, just unscrew it from the wall completely and put it aside.)
Finish Bottom Hole
Repeat steps 7-8 to drill the hole and insert the second wall anchor.
Tighten the bracket onto the wall using both holes.
Layout of Shelf Brackets
When mounting a shelf to more than one shelf bracket, you need to layout the placement of the brackets to ensure they're even and level. You wouldn't want to end up with a crooked shelf, would you?!
This is how to make sure your shelf is mounted straight and level:
After you determine the height and placement of your shelf as described in the "Before You Begin" section, mount the first bracket either in a stud or in hollow wall as instructed above.
Next, measure the height of the first wall bracket from the floor to the top of the bracket. Remember or record the measurement on a piece of paper.
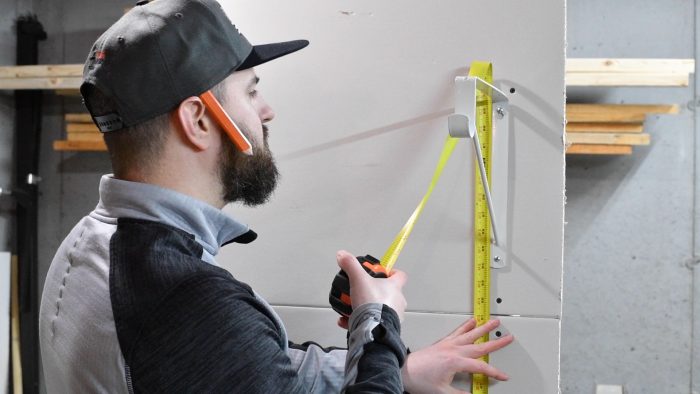
Following that, move to the area of the wall that you want your second shelf bracket to be mounted to.
Measure from the floor to the measurement you recorded earlier of the first bracket and mark the height with a pencil. Next, grab the shelf bracket and align the top of it with your pencil mark. Mark the top hole location with a pencil.

Alternatively, you can just hold the shelf bracket directly to the wall while measuring the height and mark through the top hole with a pencil.
After marking the hole location, measure the height of the pencil mark to the floor and compare it to the height of the top screw of the first wall bracket. The measurement should be very close. It's always better to measure at least twice before you drill any holes!
Partially mount the shelf bracket using only one hole according to the steps above depending on if you're over a stud or hollow wall.
Next, grab a bubble level (2 feet or longer is best) and place it across both shelf brackets. make any slight adjustments to their heights before marking and drilling for the last hole.
Mounting a Shelf to Brackets
Sometimes you will buy a kit that comes with all the necessary shelving hardware. For example a closet wire shelving kit, like this one on Amazon.com will include everything you need for attaching the shelves to the brackets.
However, if you are mounting a melamine or wood shelf to wall brackets, you need to follow the steps below:
- Measure the thickness of your shelf.
- Find screws that have a shorter length then the thickness of your shelf. The length of a screw is measured from under the head to the tip of the threaded portion.
- Find a drill bit to be used as a pre-drill for the screw size you selected.
- Place the shelf on top of the brackets and center it.
- Mark the location of one shelf bracket hole on the surface of the shelf with a pencil. It doesn't matter which hole, just pick one.
- Hold on to the shelf with your hand and drill through one of the bracket holes directly into the shelf. Be careful not to drill all the way through. You only want to drill about ½ - ¾ of the way into the shelf.
- Screw one of the screws into the hole you just made.
- Mark the second hole of the bracket with a pencil.
- Drill the hole just like you did the first hole and screw in the screw.
- Repeat this process for the remaining brackets.
Summary
There are so many different types of shelves, but a basic shelf with brackets is one of the most common.
You will have to hang your shelf on a wall using studs, using wall anchors, or both ways. Studs result in the sturdiest shelf installation, but wall anchors are great too.
If you prefer to watch the process, be sure to check out my video that shows the entire installation of a shelf.


[…] Up Next: How to Hang a Basic Shelf […]