
We wanted a rustic farmhouse dining table for our dining room, but the ones for sale at the furniture stores were either too expensive or didn't meet our expectations
Then we thought, "Hey, we already have a solid wood dining table with chairs, so let's turn it into the Rustic Farmhouse Table set of our dreams!"
Read on to see how I made this Upcycled Rustic Farmhouse Dining Room Table and Chairs set.
Making an Ordinary Dining Table into a Rustic Farmhouse Dining Table - Table Top:
Remove existing finish from table top:
If you're starting off with a table that has already been stained and/or sealed, you will need to remove the existing finish from the table top. Since the legs and other surfaces will be painted, you only need to remove the sealant from the table top.
This can be accomplished in 2 ways - chemically (with chemical stripper) or mechanically (sanding).
Chemical stripping is less labor intensive than sanding, but it's more messy. Just follow the directions on the bottle of stripper and move on to the next section of this post once the table top is clean and dry.
Mechanical removal of the existing finish by sanding is faster and cheaper, but more labor intensive than using stripper. This is my preferred method because I don't like dealing with nasty chemicals.
How to remove finish from table top by sanding.
In the likely event your table was finished with lacquer, polyurethane, or a similar finish, you're going to need to sand the table top in stages.
Tools & Supplies
- Belt Sander (preferred) - A belt sander will provide the fastest removal of material. I purchased my belt sander from Harbor Freight.
- 80 grit sanding belts (or disks).
- Orbital Disk Sander or Palm Sander - This sander will be used after you've removed all of the old finish using the belt sander.
- 120 and 220 grit sanding disks/sheets.
- Wet/Dry Shop Vacuum - This Wet/Dry Vacuum is highly rated on Amazon.com and has a detachable blower. If you don't already have a Wet/Dry Vacuum, this is a good one to check out. (affiliate link)
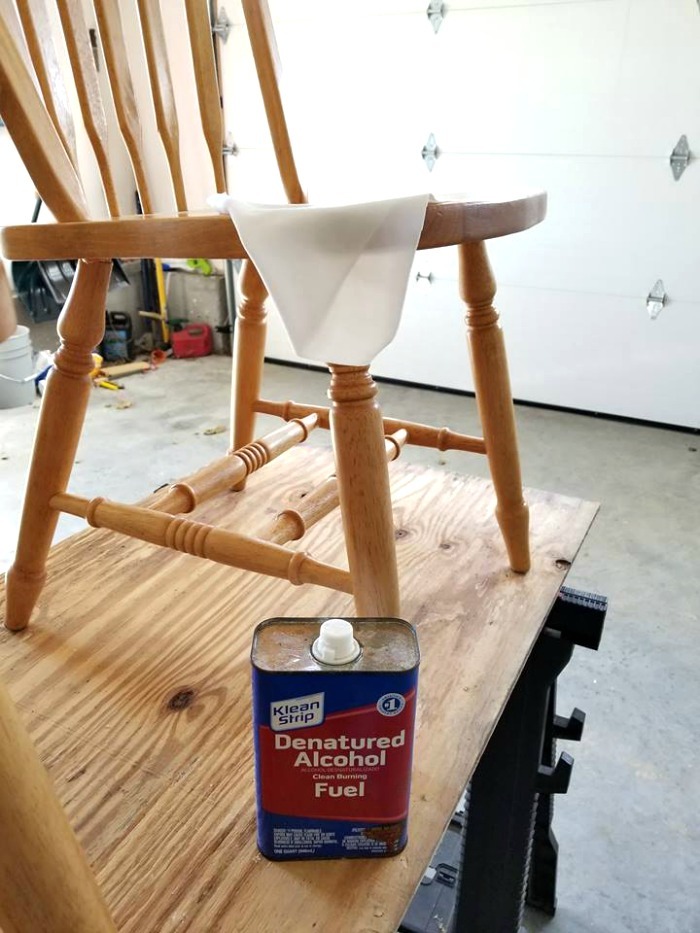
- Denatured Alcohol.
- Lint free cloths or wipes.
Process:
The process for removing an existing finish from furniture using the sanding method is pretty straight forward.
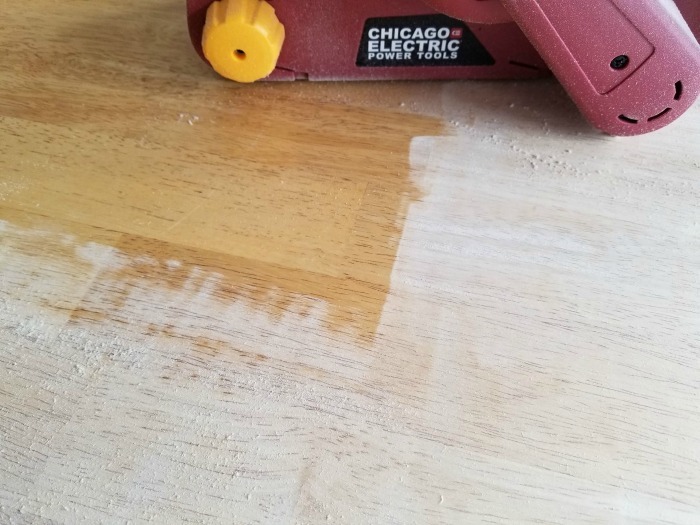
First, start by cleaning the surface with denatured alcohol (or surface cleaner) to remove dirt and oils that will clog the sanding belts prematurely. This step is optional, but recommended to save you from potentially wasting an extra sanding belt if any oils/dirt present on the surface mix with the wood dust and clog the gaps between the abrasive grits.
Next, sand the top surface of the table using a handheld belt sander equipped with an 80-grit sanding belt. Take care to keep the belt flat against the table and fully engaged at all times. If the belt isn't held flat against the surface, the edge of the belt will dig into the surface and create a gouge. This can happen in an instant, so be mindful of keeping the belt sander in your full control.
After you've sanded off all of the existing finish with 80-grit sand paper, you're ready to start stepping down to finer grit sizes.
Use 120-grit sanding disks with an orbital disk sander (I used a palm sander because I don't own an orbital disk sander) to sand the entire surface until all of the fine lines from the 80-grit belt is removed. I recommend an orbital disk sander for this step, but a palm sander will also work. It will just take longer.
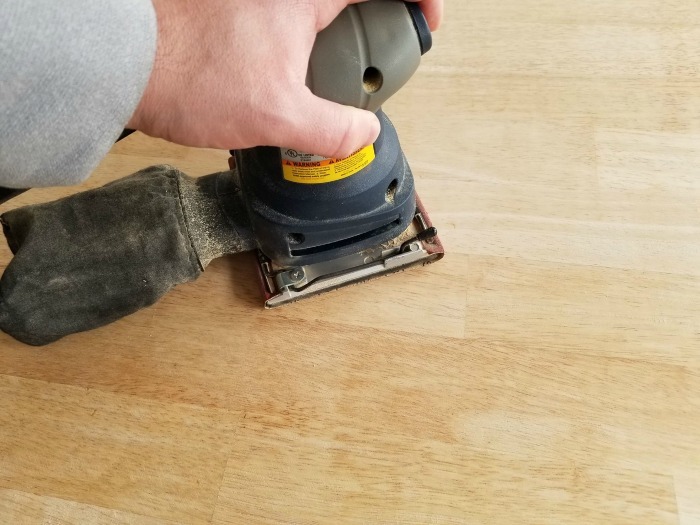
Finally, switch to 220-grit disks and sand the entire surface again to smooth it out and create a uniform finish.
Now that all of the sanding is complete, you need to remove all of the wood dust that's been generated. Start by vacuuming the surfaces with a wet/dry shop vac to suck up most of the heavy dust.
Finally, apply some denatured alcohol to a lint free wipe and wipe the entire surface to remove residual dust.
Using Distressed/Rustic Wood Stain Made from Vinegar & Steel Wool.
Now that the table top is bare wood and cleaned, it's time to apply the wood stain to create that distressed wood look.
The wood stain I used for distressed wood is homemade. You can find the recipe/instructions at my post: HOW TO MAKE VINEGAR AND STEEL WOOL STAIN FOR DISTRESSED OR RUSTIC WOOD.
Distressed Wood Staining Tools & Supplies
- Distressed wood stain
- 3-4 inch chip, foam brush, or cloth to apply the stain.
- Rubber gloves
Distressed Wood Staining Process
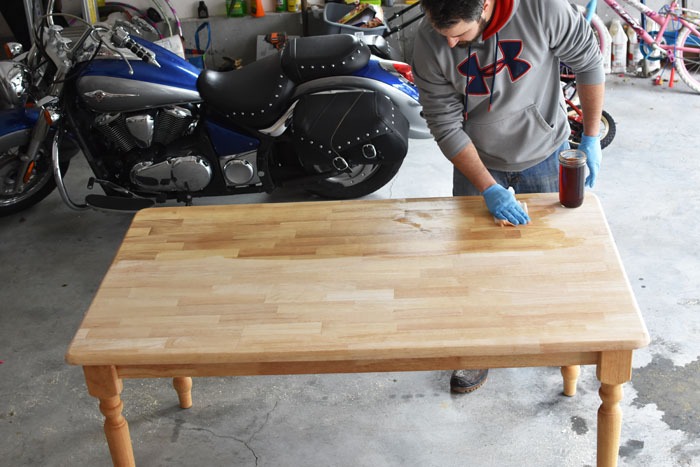
The process of staining furniture to add a distressed wood look is pretty straight forward. Since the wood stain is water based and made from natural ingredients (vinegar, steel wool and hydrogen peroxide), it's safe to work with. I still recommend using rubber gloves though, because the acidic acid from the vinegar could irritate your skin.
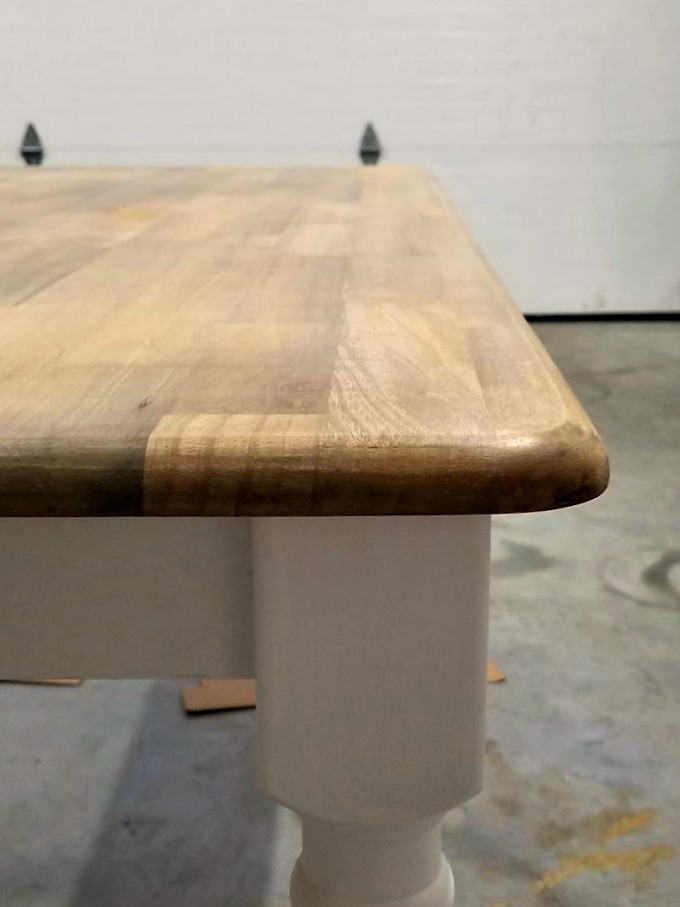
Apply an even coat of wood stain over the entire surface you want to have a distressed wood finish. Some wood species take a few minutes to start transforming to a distressed look, so just make sure you wet the entire surface.
Wait for the stain to dry. As the stain dries the wood will gain more of a rustic and distressed finish. It should feel dry to the touch after about 20 minutes.
Does the wood look distressed enough for you? If not, you can apply another coat of stain.
Painting the Table Legs, Apron, and Chairs:
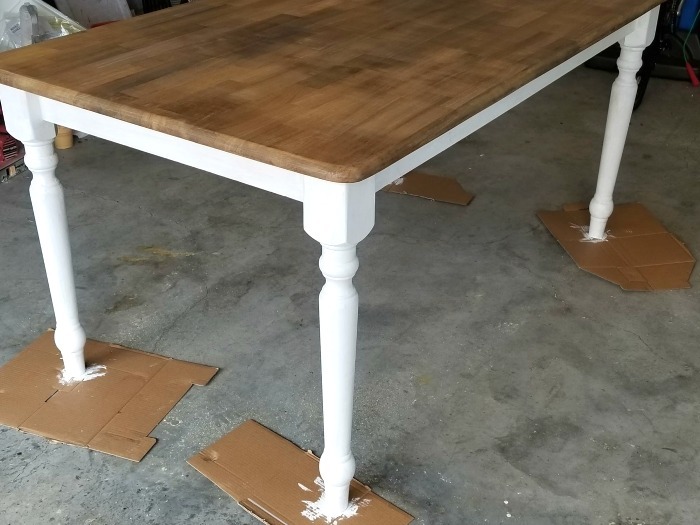
The chairs, table legs and apron (the framing under the table top that connects the legs) will be painted. You can use any paint color you want that fits your style. We used white because it compliments our farmhouse interior design.
Paint tools and supplies
- Cleaner/degreaser or denatured alcohol
- Lint free wipes
- Paint brush
- Eggshell Latex Paint (color of your choice)
Prepare the chairs, legs and Apron for paint
Before painting, you need to prepare the surfaces for paint by cleaning them to remove any oil or dirt. We have young children. I never realized how much "residue" was being collected under the table and on the chairs by their dirty/food covered hands! It took me almost 45 minutes to clean the surfaces good enough to be painted! EWWWW!
For tough dirt and oils, I recommend using a surface cleaner/degreaser first. After the surface looks clean, finish it off with the denatured alcohol to remove any residue.
Paint
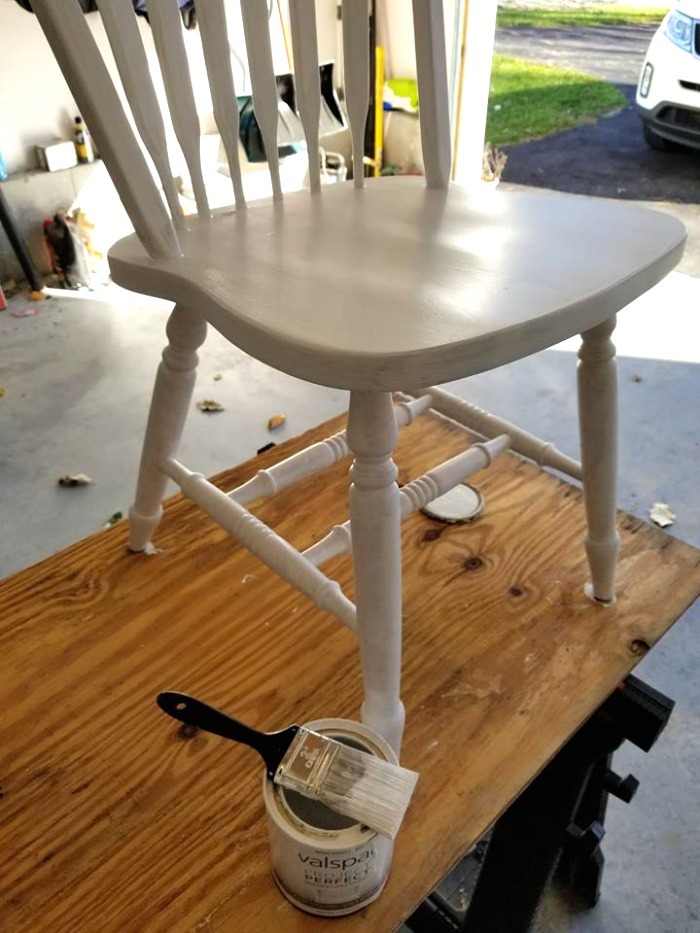
Paint all of the cleaned surfaces with 2 coats of paint and allow to dry for 1 - 2 hours.
Distress the Paint
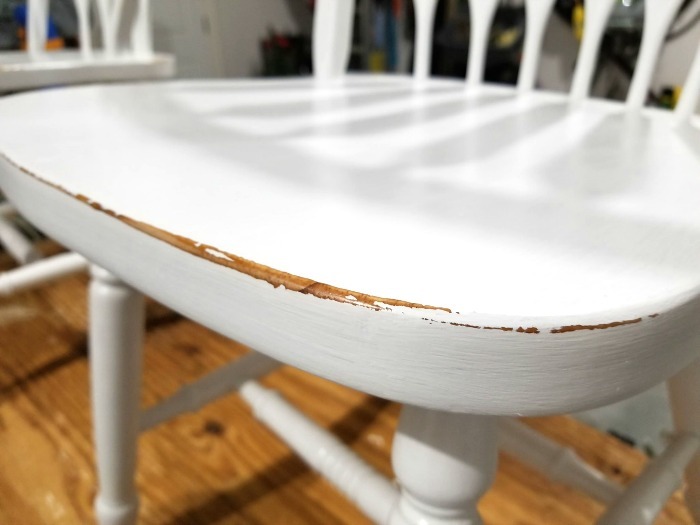
Use a 120 grit piece of sand paper to remove some paint from select edges of the chairs. You can also lightly sand some of the table and chair legs to give the paint a worn/distressed appearance.
Adding Protective Finish:
The last step is to protect your hard work by applying a protective finish to all surfaces.
Protective Finish Tools and Supplies
- Can of Polyacrylic protective finish (affiliate link) - Polyacrylic finish will create a clear and durable finish to your project. This is important because it won't add a yellow tint to the paint like polyurethane will. Furthermore, Polyacrylic is water based and easy to clean off of the paint brush when your done using it.
- Quality paint brush
- Rubber gloves
- Lint free wipes
- 320 grit sandpaper
Protective Finish Process
Make sure your surfaces have dried at least overnight and are clean.
Apply an even coat of polyacrylic finish over all surfaces. A second coat should be applied to the table top and seat of the chairs because these surfaces will see more wear and tear over time.
Before applying a second coat, it's a good idea to lightly sand the first coat of sealant with 320-grit sandpaper to ensure a smooth final finish.
You're done!
That's pretty much it. Now you have a rustic farmhouse dining table and you didn't have to pay a huge premium for it!
You can't beat the cost savings and you cant beat the great feeling of accomplishment that comes from finishing a project!
Keep on learning. Keep on creating....
It's a Husband Thing!

Let Me Know What You Think