
This article will teach you how to do basic cleaning and maintenance on a Harman Pellet Stove.
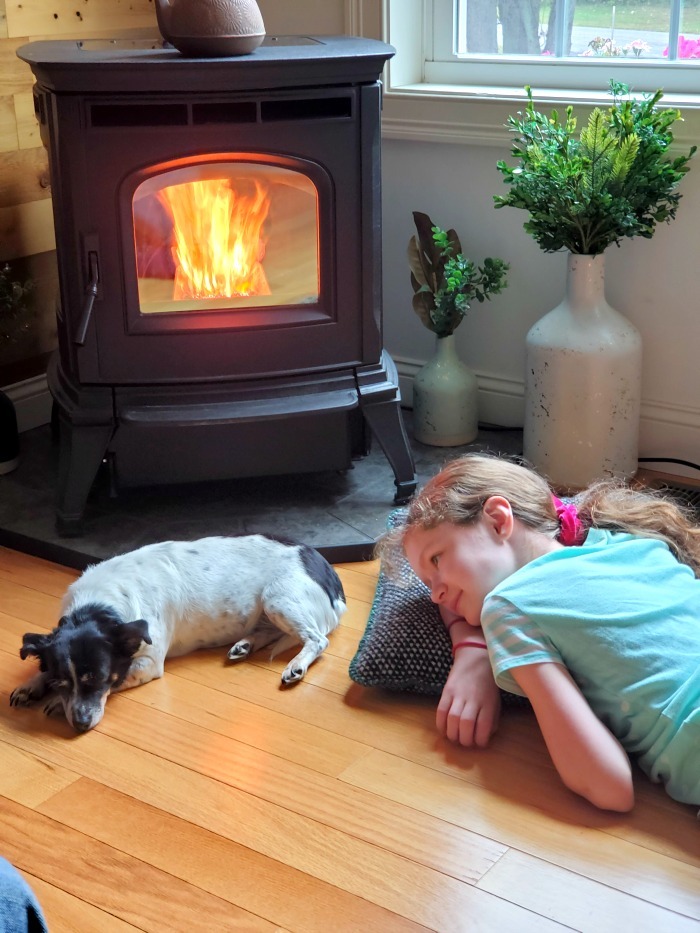
Pellet stoves are awesome as a supplemental or primary heat source depending on the size and layout of your home. However, after continuous burning of pellet fuel, your stove will need to be cleaned. Varying degrees of cleaning/maintenance should take place at different frequencies. The following is a guide to keeping your Harman pellet stove clean and maintained on the inside and out.
Disclaimer: Please note that this guide is for informational purposes only. It is not intended to replace or supercede the manufacturer's written instructions or your town/municipality regulations. The following is a compilation of tips and instructions that I have found to work on my stove. You should always practice proper safety precautions when performing any service to a pellet stove, including cleaning. We (Jaredamy Media, LLC) are not responsible for any injuries or damage to yourself, others, or property resulting from you trying any of the content found in this guide. Be safe and responsible!
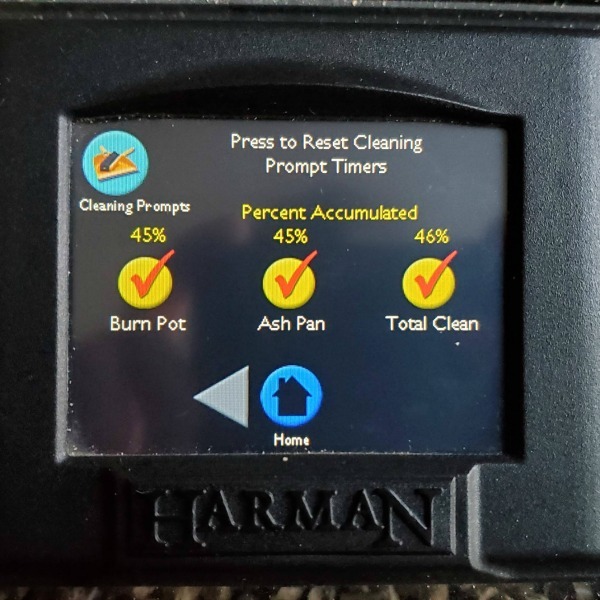
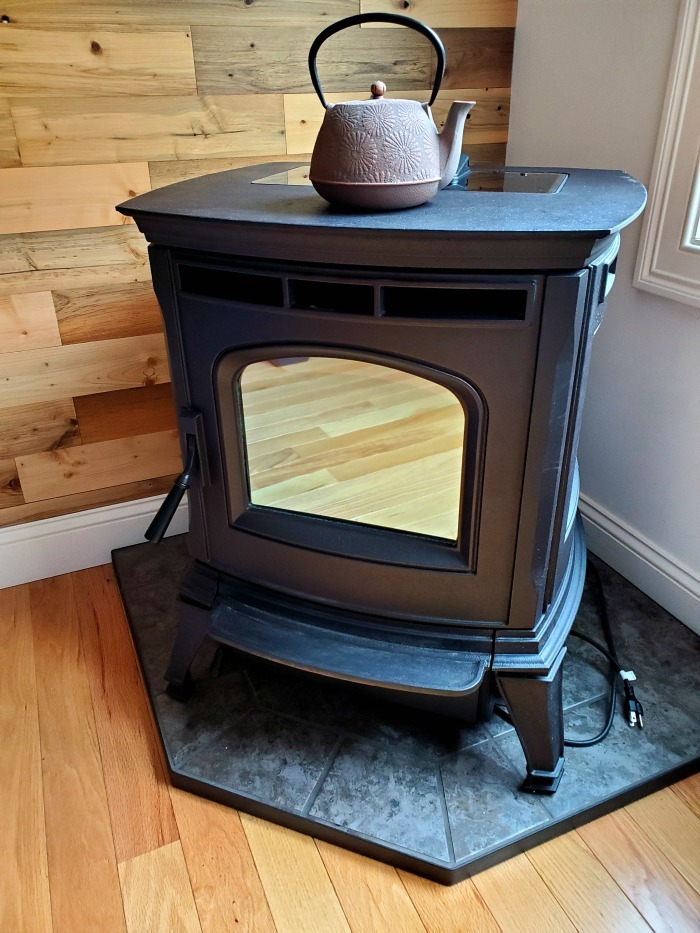
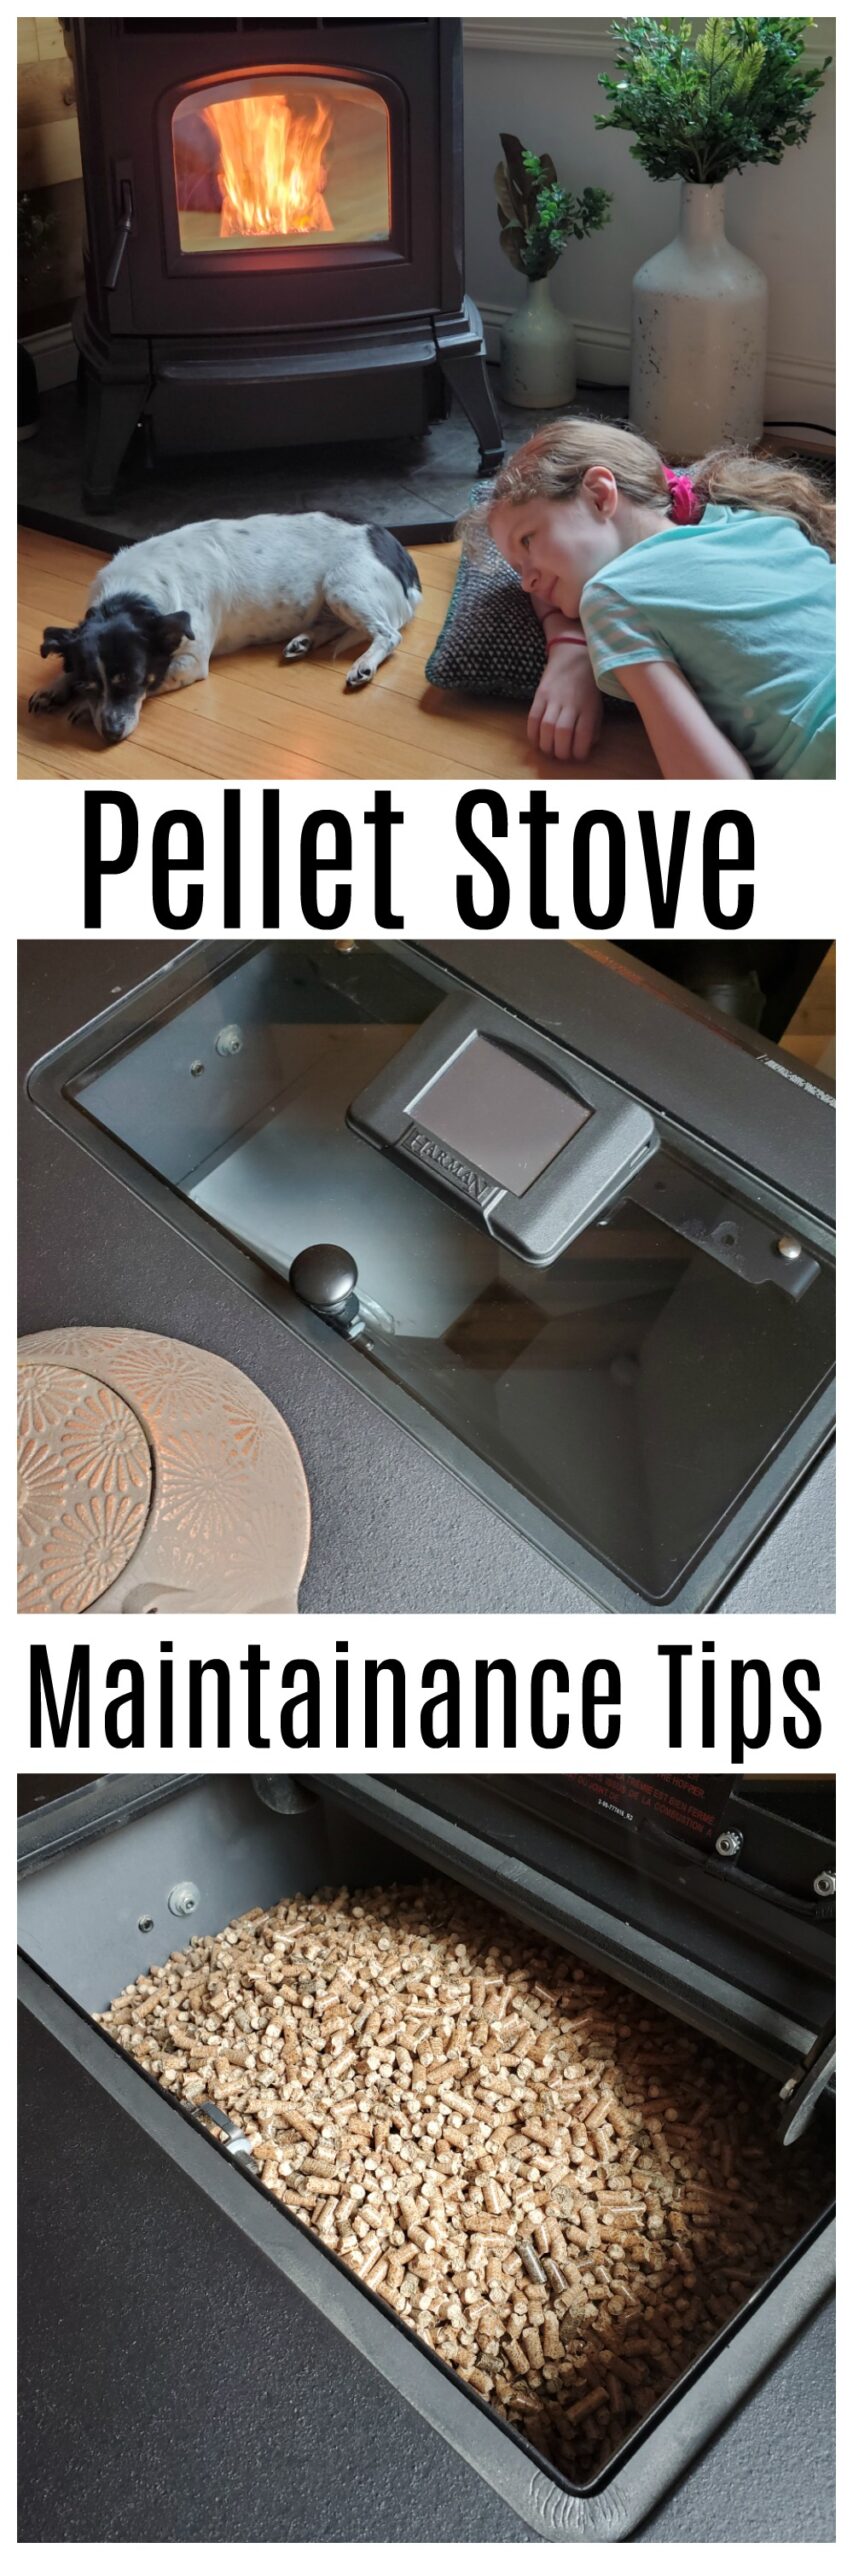
The pellet stove I'm showing in this guide is a Harman Absolute43. It's equipped with the EASY Touch Control system, which provides cleaning prompts at time intervals based on usage. If you have an older stove with an analog control, the cleaning processes will be the same, however, you won't receive the reminders.
Maintenance Schedule
Basic pellet stove maintenance is divided into 3 levels:
- Routine Daily/Weekly Cleaning
- Periodic Monthly Maintenance
- Yearly Total Clean and Maintenance
Let's dive in to each level of cleaning.
Routine Daily/Weekly Cleaning
It's important to note that the frequency to perform this type of cleaning will be dependent on how much you use your pellet stove. If you only use your stove occasionally or as supplemental heat, you should be able to stretch these cleaning out to a week or two. However, if your filling your stove with a bag of pellets every day, you may have to perform this more frequently.
Tools & Supplies
The following tools and supplies are recommended for Daily/Weekly and Monthly Cleanings:
- Flame resistant gloves (optional), not needed if the stove is off and cool.
- Metal scraper (Harman supplies one with a new purchase)
- Dust mask (optional if you're sensitive to inhaling a bit of ash)
- Dust pan and brush
- Paper towels
- Microfiber towel
- Paint / Chip Brush
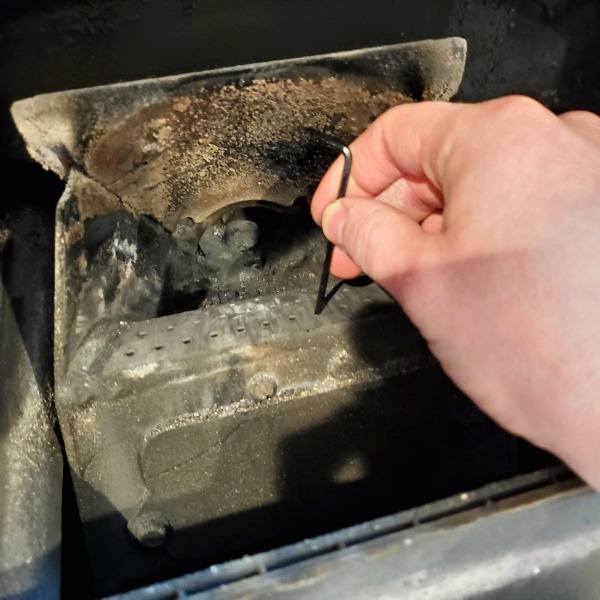
Step 1 - Scrape the burn pot
The burn pot is the part of your pellet stove that the pellets feed into and burn inside. Since this part of the stove is where most of the magic happens, it's obviously going to accumulate a buildup of ash and burnt material quickly.
1) Make sure the stove is off and cool before opening the door.
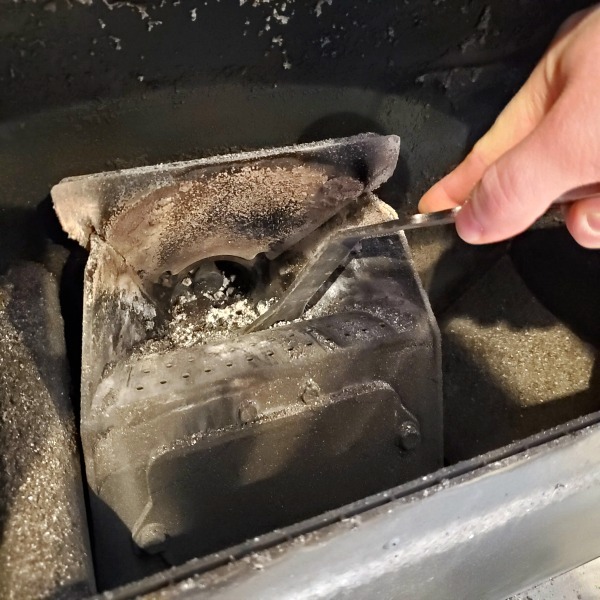
2) Using a scraper, scrape ash and all burnt material from the burn pot. Scrape it out and allow it to fall into the ash pan below.
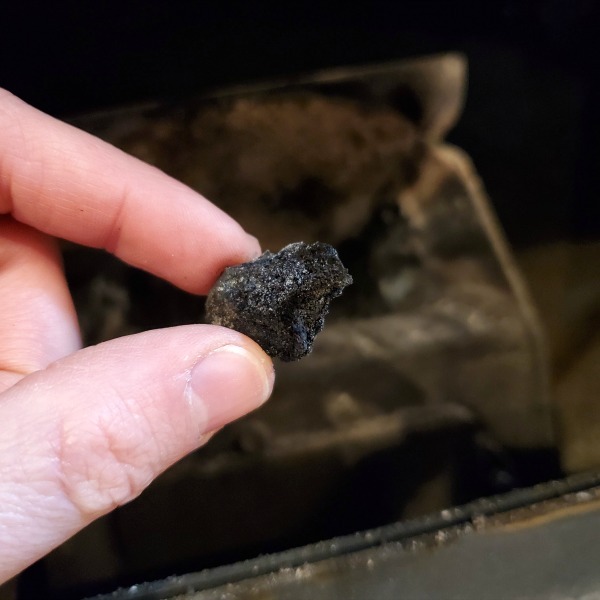
3) Hard glass-like deposits will form on the bottom and/or sides of the burn pot close to the auger tube. This stuff usually needs to be aggressively scraped to break it free of the metal surface.
4) Scrape all material out of the burn pot and over the grate (the section with a series of small holes).
5) Check the grate and make sure none of the holes are clogged with ash. These holes need to be clear for the igniter to work properly.
Step 2 - Empty the Ash Pan
The ash pan collects ash generated during the burning process. It's located at the bottom of the stove, behind a small door.
- Make sure the pellet stove is off and cool. This is important because if the stove is still warm or running, the ash pan will contain embers that could cause a fire if dumped somewhere.
- Open the door and slowly pull the ash pan toward you and out of the stove.
- Dump out the ash.
Ash can be thrown away in the trash as long as it's fully cool. Alternatively, you can dump ash in a compost pile, or somewhere else in your yard. This ash is from the wood pellets, so it's not harmful to the environment.
In fact, ash is alkaline - meaning it has a high PH. As a result, it will raise soil PH over time if continually dumped in the same place. It actually makes a good soil amendment if you're soil is too acidic.
You can also add ash to a compost tumbler!
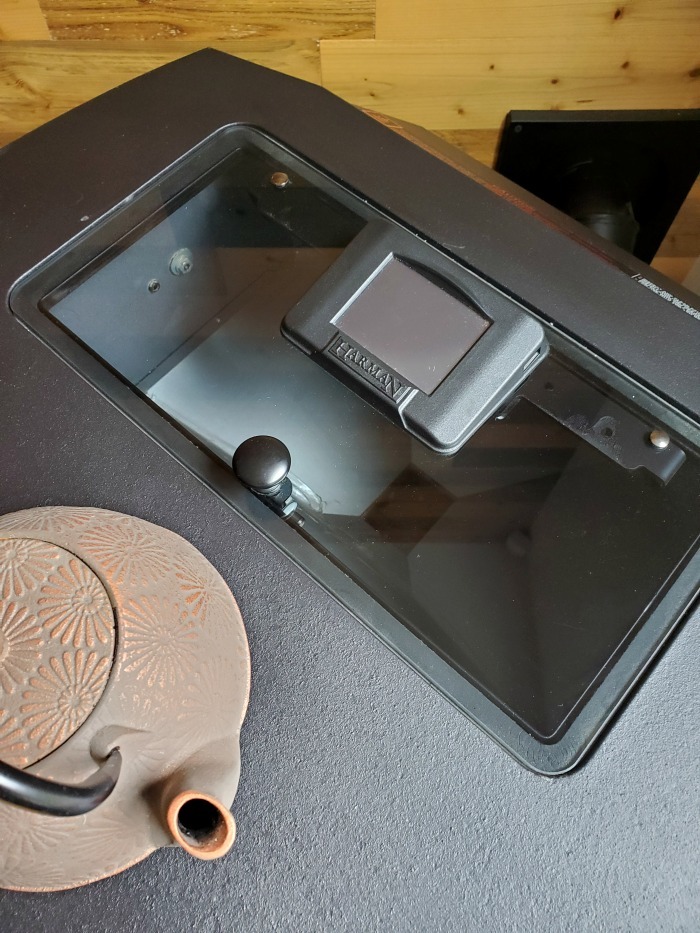
Step 3 - Clean the Glass
The glass on your pellet stove will get coated with carbon and ash deposits rather quickly. In fact, you'll probably notice that it already begins to collect burned residue before finishing one bag of pellets.
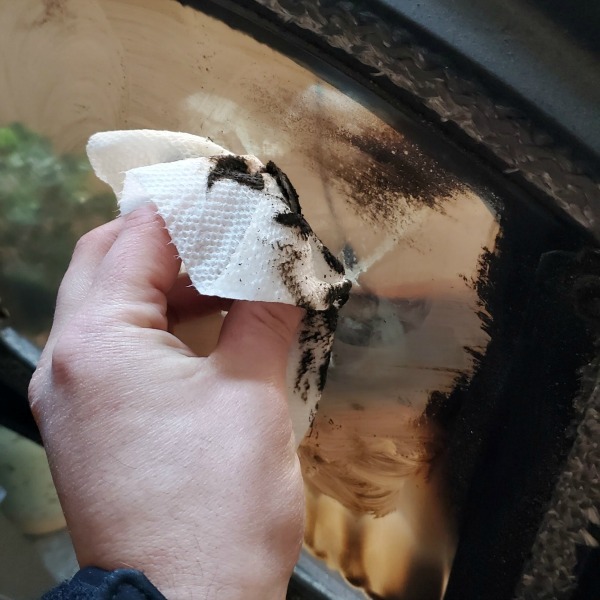
- Grab 3 paper towels.
- Wet 2 of the paper towels with plain water and wring them out until they don't drip. You want them to be moist, but not dripping wet.
- Wipe the inside of the glass with the 1st moist paper towel. This will break up the carbon and smear it around the glass.
- Put the first paper towel aside and use the 2nd moistened paper towel to finish wiping the glass until it looks clean.
- Use the dry paper towel to dry the glass to a clean finish.
Great Tips...
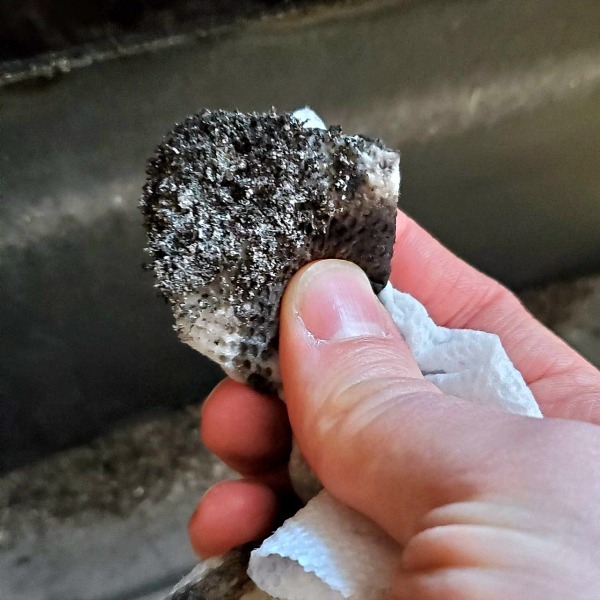
- If you have stubborn black spots that plain water won't remove, dip the moist paper towel in ash from the stove and scrub it until it disappears. The ash acts as a gentle abrasive cleaner that works perfectly to remove adhered carbon deposits on the glass.
- Never use glass cleaner containing ammonia on the pellet stove glass.
- A little bit of vinegar mixed with plain water works good too, but plain water is typically all you need.
- Place some old newspaper or a dust pan under the door while you clean the glass. It will collect the ash that falls to the floor during cleaning.
Step 4 - Clean the outside of the pellet stove.
The outside of the pellet stove is easy to clean. In most cases all you need to do is wipe it down occasionally to remove dust.
If your stove has a rough cast iron finish like ours, it's best to wipe it with a lint-free microfiber towel.
Tip: Don't use paper towels on the outside finish, because they will leave behind white lint residue.
Periodic Monthly Cleaning
Monthly cleaning includes all 4 steps above, but is more in-depth.
Scrape the burn pot as described in Step 1 above.
Focus around where the auger meets the neck of the burn pot. Deposits will form in this area. Break them free and scrape them out of the pot.
Clean the ignition grate and make sure all holes are clear.
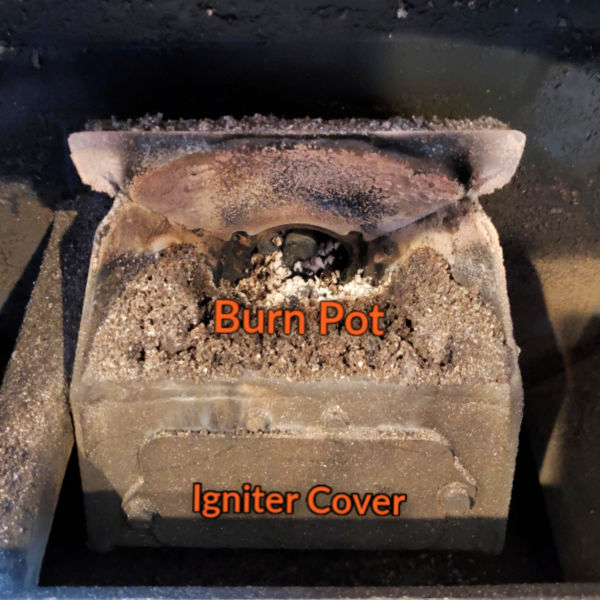
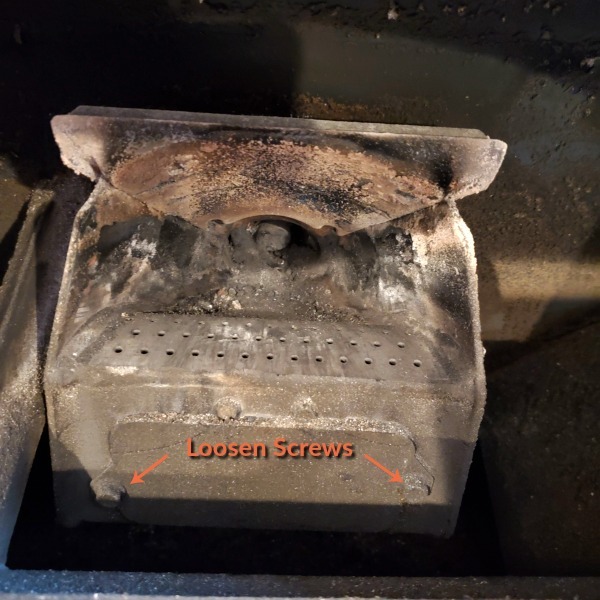
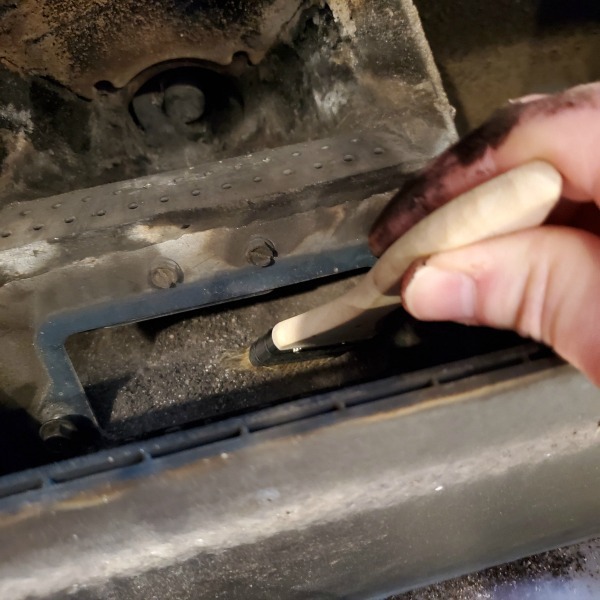
Remove the ignition cover under the grate of the burn pot. Suck or brush any accumulated ash out of the ignition cavity.
Empty the burn pot as described in Step 2 above.
Clean the glass as described in Step 3 above.
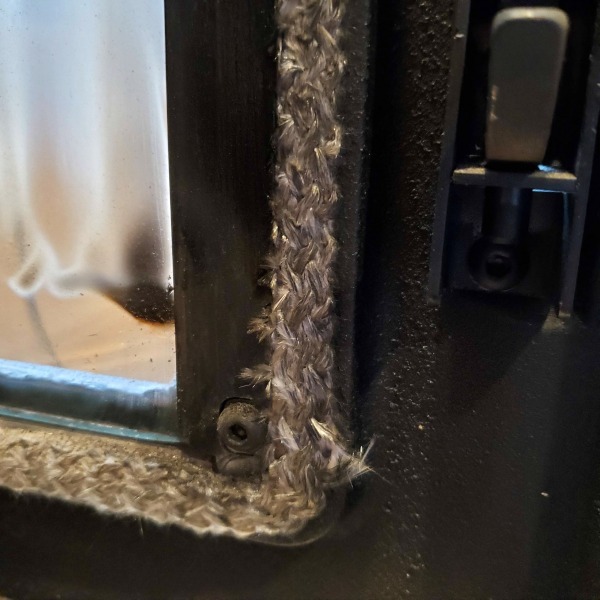
Check the gasket around the glass for damage or tears.
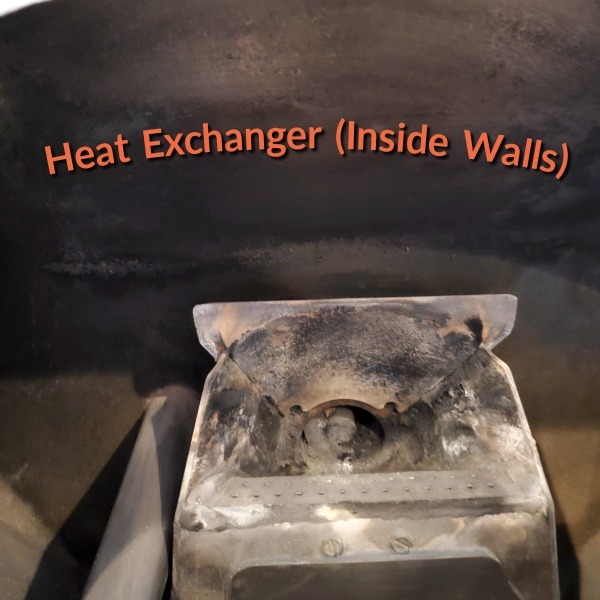
Sweep or scrape accumulated ash from the heat exchange inside the pellet stove. The heat exchange is basically the inside walls of the stove. The ash on these surfaces should be loose and come off easily.
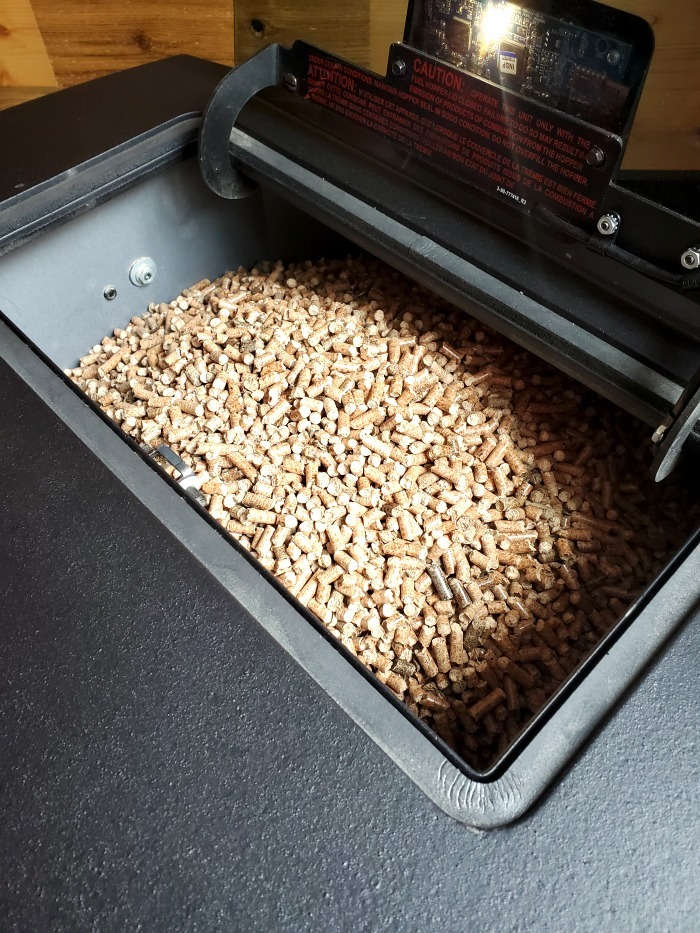
Check the gasket around the pellet hopper door for damage or tears.
Annual Cleaning
The annual cleaning consists of a thorough cleaning of the inside of the pellet stove and stove pipe. This should be performed by a qualified and insured expert. In fact, many home insurance companies require the annual cleaning to be performed by a qualified service company.
It's best to schedule the annual cleaning to be performed over the Summer or early Fall so your stove is ready to go once the weather gets colder.
Here's what should be performed as part of that service:
All cleaning covered in weekly and monthly tasks above, plus...
- Inspection of all door gaskets and seals.
- Clean and sweep the stove pipe/chimney.
- Clean/vacuum the combustion fan chamber and blades.
- Clean/vacuum the distribution blower chamber and blades.
- Inspect the overall condition of the stove for damage that could lead to failure.
Summary
Cleaning your pellet stove on a regular basis will not only ensure that it stays in good condition for years to come, it's also important to maintain its safety in your home.
Most of the process is easy to do yourself, but be sure to hire a professional for the annual cleaning before using your stove the first time during the new cold season.

Let Me Know What You Think